Beginner Guide to Collecting Geological Specimens
Table of Contents
- Getting Started With Collecting Geological Specimens
- Where to Find Geological Specimens: Sites and Legal Access
- Rock Collecting Tools: A Beginner's Toolkit
- How to Identify Rocks and Minerals in the Field
- How to Clean Mineral Specimens Without Damage
- How to Label a Mineral Collection and Store It Safely
- Buying Specimens: What to Look For
- Frequently Asked Questions
Last Updated: October 12, 2026
Getting Started With Collecting Geological Specimens
Collecting geological specimens is the practice of finding, identifying, and preserving naturally formed rocks and minerals, and it starts with a simple shift in how you look at the ground beneath you.
Start small. Pick a single focus, learn the physical properties of a handful of minerals, and let your collection grow from there. A beginner collector who can identify five minerals by hardness, streak, and luster will out-collect someone who hauls home fifty unidentified rocks.
Where to Find Geological Specimens: Sites and Legal Access
You can find geological specimens in road cuts, stream beds, quarries, construction sites, and exposed bedrock, but access rules determine where you may legally collect. According to Bureau of Land Management guidance on rock collecting, casual collecting of common rocks, minerals, and petrified wood is generally allowed on many public lands for personal use, while other areas are closed entirely.
Public Lands and Collecting Regulations
Rules vary by who manages the land. National parks and monuments prohibit collecting in almost all cases. National forests, BLM land, and many state lands allow limited personal collecting.
Private land is simpler in one way and stricter in another. You need the owner's permission, in writing if possible, and you should never assume that an open field or a roadside is fair game.
Low-Impact Field Practices
Take only what you will actually keep, and leave the rest for the next person. Fill your holes, avoid disturbing vegetation and animal habitat, and never collect from protected formations or historic sites. A good rule: if removing a specimen would visibly damage the site, leave it.
Rock Collecting Tools: A Beginner's Toolkit
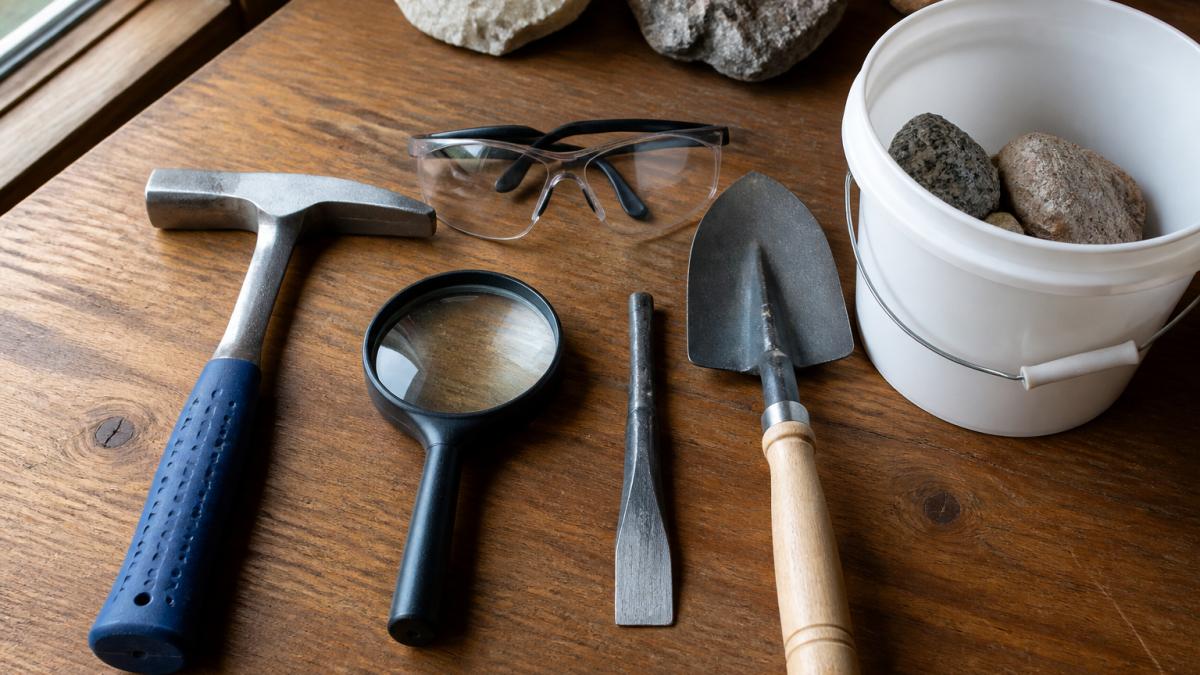
A functional beginner's toolkit costs less than most people expect and fits in a single bucket. The trap is buying a full field kit before you know what you actually need.
Tier 1: Essentials You Should Not Collect Without
- Safety glasses: non-negotiable. Rock chips fly unpredictably, and a fragment off a hammer strike can travel several feet. Buy ANSI Z87.1-rated eye protection, not sunglasses or reading glasses.
- Geologist's hammer or rock hammer: one flat face for breaking, one pointed end for prying. A 22-ounce head is the common all-purpose weight; lighter heads bounce off hard rock, heavier ones tire your wrist on a long day.
- Hand lens or magnifying glass: 10x magnification is the standard for examining crystal faces and grain texture. A folding 10x loupe with a protective case survives a pocket better than a loose magnifier.
Tier 2: Useful Once You Have a Site
- Chisel and mallet: for working a seam without shattering the specimen. A cold chisel plus a soft-face mallet gives you more control than a hammer alone on layered rock.
- Small shovel or trowel: for digging in soft material and stream gravel. A garden trowel is fine to start; a short-handled spade is better in cobble.
- Gloves: leather or cut-resistant work gloves protect hands from sharp edges and from the vibration of repeated hammering.
Tier 3: Upgrades Worth Waiting For
- Crack hammer or sledge: for softer material and for driving chisels. Not a starter purchase.
- Streak plate and dilute acid: identification tools better kept at home than carried into the field.
- Hard hat and steel-toed boots: worth the money if you collect near road cuts, talus, or any slope with loose rock overhead.
What You Can Borrow or Improvise Safely
You do not need to buy everything at once. A local gem and mineral club often lends hammers and hand lenses to members, and many clubs run organized field trips where you can try gear before buying. A hardware-store cold chisel and a household hammer can substitute for a geologist's hammer on soft sedimentary rock, but do not use a standard claw hammer on hard igneous rock, the claw can snap and send steel fragments flying.
| Tool | What It Does | Priority | Rough Cost Tier |
|---|---|---|---|
| Safety glasses | Protects eyes from chips | Essential | Low |
| Geologist's hammer | Breaks and pries rock | Essential | Mid |
| Hand lens 10x | Examines crystal detail | Essential | Low |
| Bucket and wrap | Carries and protects finds | Essential | Low |
| Chisel and mallet | Opens seams cleanly | Useful | Low |
| Trowel | Digs soft material | Useful | Low |
| Gloves | Protects hands from edges | Useful | Low |
| Crack hammer | Heavy breaking | Upgrade | Mid |
How to Identify Rocks and Minerals in the Field
Learning how to identify rocks and minerals comes down to testing a few physical properties in a consistent order, then carrying that work forward into a record you can revisit. Hardness, streak, luster, and acid reaction will separate most common minerals before you ever get home, but the identification is only as good as the notes you keep.
Physical Properties and Simple Tests
Work through the same sequence every time so your observations stay comparable:
- Hardness: scratch the specimen against a known reference. The Mohs scale runs from talc at 1 to diamond at 10. A copper coin sits around 3.5, a steel nail around 5.5, and quartz at 7. Test on a fresh surface, not a weathered one.
- Streak: drag the specimen across an unglazed porcelain streak plate. The powder color often differs from the surface color and is more reliable. Hematite, for example, can look metallic gray but leaves a red-brown streak.
- Luster: note whether the surface looks metallic or non-metallic, and whether it is vitreous, greasy, or dull. Luster is judged on a fresh, unweathered face.
- Acid reaction: a drop of dilute acid fizzes on calcite and other carbonate minerals. Keep the acid in a labeled dropper bottle and never carry it loose in a pocket.
- Ultraviolet reaction: some minerals fluoresce under UV light, which can confirm an identification. A shortwave UV lamp is the more useful of the two wavelengths for most species, but it is a home tool, not a field one.
Record each result in your field notes next to the location. That record is what makes a specimen scientifically useful rather than just decorative.
A Field-to-Cabinet Workflow
The gap between a casual find and a cataloged specimen is a repeatable process. Run the same steps every trip:
- Research before you go. Check the geology of the area and what minerals are known to occur there. Knowing what is possible keeps you from misidentifying a common mineral as something rare.
- Photograph in place. Shoot the specimen before you remove it, with a coin or lens cap for scale. The surrounding rock often tells you more about origin than the specimen does on its own.
- Record the location. Note the site, the date, and the rock unit or surrounding material. GPS coordinates are ideal; a written description plus a landmark is workable.
- Assign a provisional ID. Write what you think it is and mark it as provisional. A guess you can revise beats a blank label.
- Bag and label on site. Put a paper tag with the field number in the bag with the specimen, not on the outside where it can rub off.
- Confirm at home. Re-run the tests under better light, check reference material, and update the record.
- Catalog and store. Transfer the field record into a notebook or spreadsheet and shelve the specimen with its catalog number.
When to Get a Second Opinion
Field identification has limits. If a specimen does not clearly match a known mineral, label it as unidentified and seek verification rather than guessing. Local gem and mineral clubs, university geology departments, and experienced collectors can all help confirm a tricky piece. A photograph with a scale and a written description of the tests you ran will get you a faster, more useful answer than a specimen alone.
How to Clean Mineral Specimens Without Damage
Cleaning is where beginners do the most harm. Most mineral specimens need only water, a soft brush, and patience. Start with the gentlest method and escalate only if needed.
- Dry brush first: remove loose dust with a soft-bristled brush before any water touches the piece.
- Water only: many hard minerals tolerate a brief rinse. Blot dry, never rub.
- Avoid acid unless you know the mineral: acid dissolves carbonates and damages many others.
If a specimen has delicate crystal formations, leave it dirty rather than risk breaking it. A dusty intact crystal beats a clean broken one.
Natural Pyrite Crystal Druzy Freeform | Metallic Cubic Crystal Cluster →
How to Label a Mineral Collection and Store It Safely
Learning how to label a mineral collection properly is what separates a pile of rocks from a real collection.
Use a small paper label with the catalog number only, placed with the specimen, not glued to it. Keep the full record in a notebook or spreadsheet.
| Storage Method | Best For | Watch Out For |
|---|---|---|
| Open shelf with stands | Display pieces | Dust and UV fading |
| Padded box with label | Fragile crystals | Crushing during handling |
| Cabinet with drawers | Large collections | Humidity in some climates |
Keep specimens out of direct sunlight, which fades many mineral colors over time. Handle pieces by the matrix where possible, and wash your hands after handling minerals you have not yet identified.
Buying Specimens: What to Look For
Buying is a legitimate part of collecting, and it is how most people acquire pieces they could never find in the field. When you buy, ask where the specimen came from, whether it has been treated or repaired, and whether the seller will stand behind the identification.
This is where a curated shop earns its place. Our Natural Malachite Botryoidal Mineral Specimen is a good example of why natural formation matters: the rounded botryoidal texture and fibrous detail are exactly what a collector looks for, and the piece ships on a display stand ready to catalog. For a first purchase, a piece like our Natural Epidote Crystal Cluster shows clear prismatic crystal form on matrix, which makes it a strong study specimen as well as a display piece.


Buy from sellers who photograph the actual piece, not a stock image. A listing that shows the exact specimen you receive removes the biggest risk in online buying.
Frequently Asked Questions
How do I start a rock and mineral collection?
Begin by deciding what you want to collect, such as a specific mineral type or local rocks. Gather basic tools like a rock hammer, hand lens, and safety glasses. Join a local rock club for field trip access and guidance. Start with common specimens found on public lands where collecting is allowed, and always check regulations before you go. Label each find with location and date to build a meaningful collection over time.
What geological specimens should a beginner collect first?
Start with common, easily identifiable minerals like quartz, pyrite, calcite, and mica. These are found in many locations and help you learn basic identification skills. Collecting geological specimens from road cuts or construction sites often yields fresh material. As you gain confidence, add more variety. Many beginners also purchase display-quality pieces to complement field finds, such as a natural pyrite crystal druzy freeform from a trusted seller.
What tools do I need to collect rocks and minerals?
A basic rock collecting toolkit includes a geologist's hammer or rock pick, a hand lens (10x magnification), safety glasses, a chisel, a small shovel, and a bucket or bag for specimens. A field notebook and permanent marker for labeling are also useful. For cleaning, bring a soft brush. These tools cover most beginner needs. Avoid using ordinary hammers, which can damage specimens and are not designed for rock breaking.
How can I identify a rock or mineral specimen?
Examine physical properties: hardness (Mohs scale), streak color, luster, transparency, and acid reaction. Use a hand lens to observe crystal form. Test hardness by scratching the specimen with common objects like a fingernail, coin, or steel file. Streak is tested on an unglazed porcelain tile. For a definitive ID, consult a field guide or a local expert. Remember that visual identification has limits; some minerals require lab testing.
Where can I legally collect rocks and minerals?
Collecting rules vary by location. On federal lands, recreational collecting is often allowed on Bureau of Land Management (BLM) and U.S. Forest Service lands for personal use, but limits apply. National Parks and Monuments generally prohibit collecting. Always check with the land management agency before you go. On private land, you need explicit permission from the owner. Join a local rock club to learn about legal collecting sites in your area.
How should I clean and store mineral specimens?
Clean specimens gently with water and a soft brush; avoid harsh chemicals unless you know the mineral is stable. Some minerals, like halite, dissolve in water. For storage, keep specimens in a dry, dust-free environment away from direct sunlight. Use individual boxes or padded trays to prevent scratches. Label each with a unique number and record details in a collection sheet or database. Handle delicate pieces minimally.
How do I organize and label a mineral collection?
Assign each specimen a unique catalog number. Create a label with the mineral name, location, date collected, and your catalog number. Store labels with the specimen or in a separate database. Use a collection sheet or spreadsheet to track additional details like size, color, and acquisition source. Organize by mineral type, locality, or acquisition date. Consistent labeling makes your collection more valuable and educational.
Is it better to collect specimens in the field or buy them?
Both have value. Field collecting builds skills and provides personal connection to the specimen. Buying allows you to acquire rare or display-quality pieces not found locally. Many collectors do both. When buying, choose reputable sellers who provide accurate identification and sourcing. For example, IG Crystal Archive offers hand-selected specimens with detailed descriptions, and your purchase supports a mission to assist autistic adults and their families.
Building a collection takes patience, a few good tools, and the discipline to label what you find. If you would rather start with a piece that has already been vetted, IG Crystal Archive offers hand-selected specimens, secure professional packaging, and 30-day free returns, and every purchase supports our mission to assist autistic adults and their families. Shop crystals with IG Crystal Archive and start your collection with a piece you can trust.