How to Clean Raw Minerals Safely at Home
Quick Summary
The best way to clean raw minerals is to identify the mineral and its deposit first, then start with dry brushing and move to lukewarm water with mild soap only if needed. Avoid hot water, vinegar, and strong acids, since many minerals react to them and can be permanently damaged.
- Dry brush loose dirt and sand before any water touches the specimen.
- Use lukewarm water with a few drops of mild dish soap, not hot water.
- Soak specimens for 10 to 15 minutes, and never leave soft minerals submerged overnight.
- Test any solution on a small hidden spot and wait 24 hours before full cleaning.
- Stop immediately if you see dulling, pitting, fizzing, flaking, or new cracks.
Table of Contents
- Start by Identifying Your Mineral and Its Deposits
- Gather Your Supplies and Set Up a Safe Workspace
- How to Clean Mineral Specimens with Water and Gentle Tools
- How to Clean Quartz and Other Durable Minerals
- Safe Cleaning Solutions for Minerals and What to Avoid
- Removing Iron Stains from Rocks Without Damaging the Surface
- Keep Your Cleaned Specimen on Display and Protect Your Next Piece
- Frequently Asked Questions
Start by Identifying Your Mineral and Its Deposits
Last Updated: November 2, 2026
Cleaning a raw mineral the wrong way can ruin it in one session. Readers who want broader guidance on rare mineral treasures and what to look for in serious collecting can find it on that page.
A specimen is a natural mineral piece kept for study or display. Its deposit is the crust, staining, or matrix stuck to it, such as iron oxide, clay, or calcite coating.
Before you pick a method, check these points:
- Hardness: Softer minerals like calcite and selenite scratch and dissolve easily. Harder ones like quartz handle more.
- Solubility: Some minerals dissolve or soften in water. Test a small hidden spot first.
- Sensitivity: Certain specimens fade or fracture with heat, sudden temperature changes, or prolonged sunlight.
A quick decision guide helps:
| What You See | Likely Cause | First Step |
|---|---|---|
| Loose dust or soil | Surface dirt | Dry brush, then rinse |
| Rusty brown film | Iron oxide staining | Test a gentle soak first |
| Chalky white crust | Mineral residue | Soak in lukewarm water |
| Soft or flaking surface | Delicate specimen | Avoid soaking; brush only |
Watch out: never assume a mineral is safe to soak because it looks tough. Many specimens look solid and still crack or dissolve.
If you are unsure what your piece is, a mineral guide or local geology club can help confirm it.
Gather Your Supplies and Set Up a Safe Workspace
You do not need expensive tools to clean raw minerals well. Most of what you need is already in a home workshop or kitchen.
Here is a practical starter kit:
- Nitrile or rubber gloves
- Safety glasses, especially when using any chemicals
- Soft-bristled toothbrushes and an old paintbrush
Set up on a surface you do not mind getting wet, like a clean kitchen counter or utility sink.
Many collectors keep a small notebook to record the mineral name, origin, and method used, avoiding repeated mistakes.
How to Clean Mineral Specimens with Water and Gentle Tools
Water and soft tools handle most cleaning jobs. Start gently and work up only if needed.
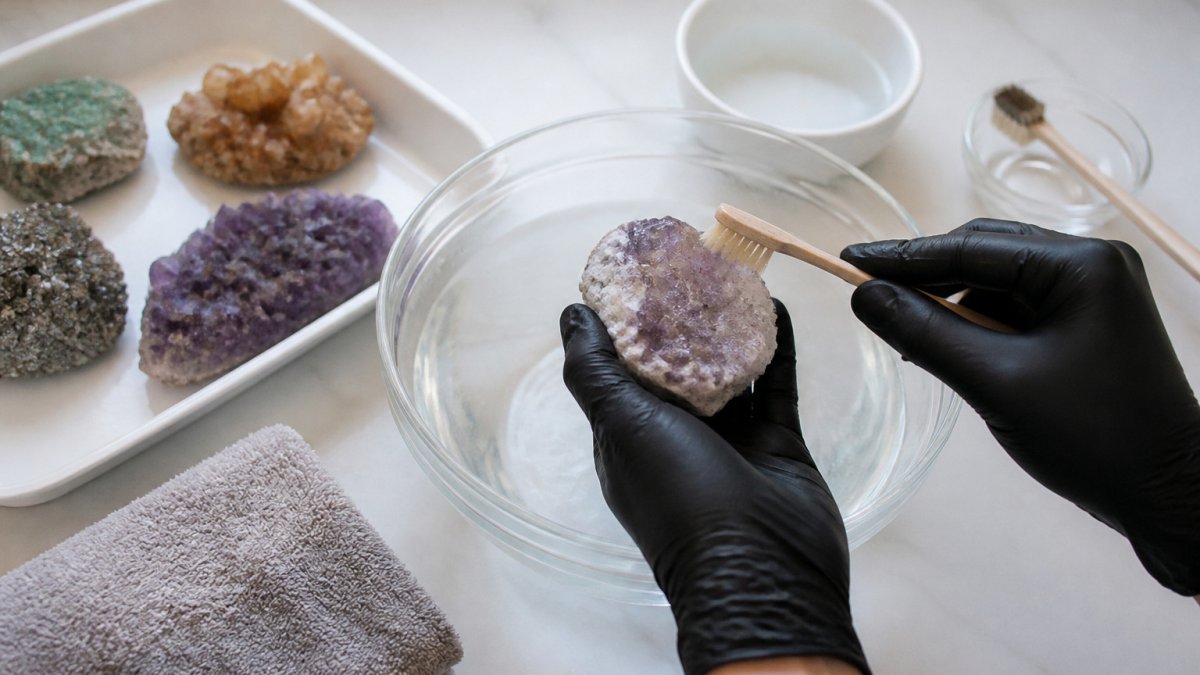
Removing Loose Dirt, Sand, and Debris
Dry brushing comes first. Loose grit can scratch the surface when wet, so remove it before any water touches the piece.
- Hold the specimen over a tray or bowl.
- Use a dry, soft paintbrush to sweep away dust and sand.
- Use a toothpick or soft brush to clear debris from cracks and crevices.
- Blow gently on the surface to dislodge stubborn bits, then brush again.
Once loose material is gone, a rinse is usually enough to clear the rest.
Gentle Washing with Lukewarm Water and Soap
For specimens that still look dirty after dry brushing, a gentle wash works well.
- Fill a tub with lukewarm water. Avoid hot water, which can crack some minerals.
- Add a few drops of mild dish soap.
- Submerge the specimen and let it soak for 10 to 15 minutes.
- Brush gently with a soft toothbrush in small circles.
- Rinse thoroughly in clean lukewarm water.
- Pat dry with a soft cloth, then air dry away from direct sunlight.
Soaking is the step to watch closely. Soft or porous minerals can take in water or weaken, so limit soak time and never leave them in water overnight.
How to Clean Quartz and Other Durable Minerals
Quartz is one of the most common specimens and is relatively durable. It generally tolerates water and gentle brushing.
Use the same steps as the water-and-soap method above, and feel free to scrub a little harder with a stiff brush on rough areas.
For clear quartz clusters, a final rinse in distilled water can prevent water spots.
Quartz does not need harsh chemicals for most cleaning jobs.
Safe Cleaning Solutions for Minerals and What to Avoid
Mild solutions handle most jobs. Stronger treatments can work, but only after you have confirmed the mineral can take them.
Large Raw Black Tourmaline Chunk – Natural Protection Stone | Collector Display →
| Mineral | Generally safe | Risky or avoid | Warning signs to stop |
|---|---|---|---|
| Quartz | Lukewarm water and mild dish soap, soft to medium brush, distilled water rinse | Prolonged soaking in strong acids; metal tools | Cloudy film, pitted surface, new cracks |
| Calcite | Dry brushing, brief lukewarm rinse, short soap wash | Vinegar, oxalic acid, any acid; long soaks | Fizzing, chalky residue, surface etching |
| Selenite (gypsum) | Dry brushing only; brief spot cleaning with a barely damp cloth | Water immersion, hot water, acids | Softening, flaking, surface pitting |
| Malachite and azurite | Dry brushing, brief lukewarm rinse | Acids of any kind, including vinegar; ammonia | Color change, dulling, bubbling |
| Pyrite | Dry brushing, brief lukewarm rinse, thorough drying | Long soaks, humid storage, acid treatments | Rust bloom, white powdery efflorescence, cracking |
| Fluorite | Lukewarm water, soft brush, quick rinse | Hot water, sudden temperature change, ultrasonic cleaners | Fracturing along cleavage, cloudiness |
| Halite (rock salt) | Dry brushing only | Any water; humid air | Dissolving, surface pitting, sticky residue |
| Hematite | Lukewarm water, mild soap, soft brush | Strong acids, prolonged soaking | Dulling, reddish runoff, surface etching |
Use this as a starting point, not a guarantee. Specimens vary, and a mixed piece can behave differently from a pure one.
Common mild options and what they actually do:
- Lukewarm water with mild dish soap: the safest starting point for nearly all specimens. The surfactant lifts loose dirt and light oils without reacting with the mineral.
- Distilled water: best for rinsing and preventing water spots on clear specimens. Tap water can leave mineral deposits as it dries.
- Diluted white vinegar: useful for some calcite-based crusts on durable minerals, but dangerous for calcite, malachite, azurite, and any carbonate. The acid reacts with the carbonate itself, not just the crust.
Avoid these, because they can damage many minerals:
- Bleach and ammonia-based cleaners, which can react with sulfides and produce hazardous fumes.
- Strong acids on carbonates like calcite, malachite, and azurite.
- Hot water and sudden temperature changes, which can crack specimens along cleavage planes.
Watch out: many "natural" cleaners still react chemically with minerals. Vinegar and lemon juice are acids, and both will etch calcite and dissolve malachite.
A Decision Sequence for Unknown Specimens
When you cannot confirm the mineral, work through this sequence instead of guessing:
- Identify the coating, not just the mineral. Loose dust, clay, iron oxide, and mineral crusts each respond to different methods. A rusty film is not the same problem as a chalky white crust.
- Test on a small hidden area first. Apply the gentlest option, wait 24 hours, and check for color change, dulling, pitting, or new cracks.
- Choose the least aggressive treatment that could work. Dry brushing before water, water before soap, soap before acid.
- Stop at the first sign of damage. Dulling, fizzing, flaking, or a new crack means the method is wrong for that piece.
Chemical Safety, Storage, and Disposal
Acid use appears in most guides, but the practical safety steps are often missing. If you use oxalic acid or any other treatment:
- PPE: nitrile gloves, safety glasses, and a long-sleeved shirt. Oxalic acid is toxic and can be absorbed through skin.
- Ventilation: work outdoors or in a well-ventilated space. Do not use acids in a closed room.
- Storage: keep acids in labeled, tightly closed containers, out of reach of children and pets, and away from bases and reactive materials.
Never pour cleaning chemicals down a drain without checking local rules, and store all solutions out of reach of children and pets.
Removing Iron Stains from Rocks Without Damaging the Surface
Iron stains show up as rusty brown or orange film, often in cracks and pores. Removing them takes patience, because aggressive methods can etch the stone.
Start with the gentlest option:
- Soak the specimen in lukewarm water with a few drops of dish soap for up to one hour.
- Brush the stained area with a soft toothbrush.
- Check progress. If the stain softens, repeat the soak a few times.
If that does not work, a commercial iron remover made for rocks and minerals may help. Follow the label exactly, and test it on a hidden spot first. Some formulas use oxalic acid, which is toxic and must be handled with gloves and eye protection.
What Each Treatment Actually Does
- Soap and water: lifts loose iron-bearing dirt and light surface film. It will not remove a stain that has bonded to the surface.
- Oxalic acid: dissolves iron oxide by chelating the iron. It works well on quartz and other acid-tolerant minerals, but it will etch calcite, malachite, and azurite. It is toxic and requires gloves, eye protection, and ventilation.
- Commercial iron removers: formulations vary. Some are acid-based and some are not. Read the label for the active ingredient before you assume a product is safe for your mineral.
Before-and-After Outcomes to Expect
Typical outcomes help set realistic expectations. In general:
- Light surface film on quartz: a one-hour soap soak followed by brushing often removes most of it, with a distilled water rinse to prevent spots.
- Deep iron staining in quartz cracks: oxalic acid treatment can lighten the stain over several applications, but it rarely removes it completely, and over-treatment can dull the surface.
- Iron staining on calcite or malachite: acid treatment causes etching or dissolution. The correct outcome is to stop and accept the stain rather than damage the specimen.
Watch out: a stain that does not respond after two or three gentle attempts is likely penetrated or mineralogically part of the piece. Further treatment risks the specimen more than it improves it.
When to Stop and When to Consult a Conservator
Stop cleaning and set the specimen aside if you see dulling, pitting, fizzing, flaking, or new cracks. For rare, valuable, or fragile pieces, consult a conservator before attempting acid treatments.
Test every treatment on a small hidden area first, wait 24 hours, and check for changes in color or texture. Stop if the surface looks dull, pitted, or etched.
Keep Your Cleaned Specimen on Display and Protect Your Next Piece
Once your mineral is clean and fully dry, choose a display spot with care. For guidance on building and caring for a broader collection, see how to start a mineral collection as a beginner. If you have pets, check whether raw mineral decor is safe for homes with pets before placing specimens within their reach.
Dust regularly with a dry soft brush. Save deep cleaning for when it is truly needed, since frequent scrubbing wears surfaces down.
Store extra specimens in padded boxes so they do not knock together. Label each with its name and cleaning history.
For your next piece, repeat the same steps: identify the mineral, test your method, and go slowly. If you are building a broader collection, IG Crystal Archive, LLC carries hand-selected specimens, including the Natural Smoky Quartz Crystal Cluster | Dark Smoky Quartz Points on Matrix | Raw Mineral Specimen at $64.00.

Frequently Asked Questions
What is the safest way to clean raw minerals?
For most raw minerals, the safest method is to remove loose dirt with a soft brush, then wash the specimen in lukewarm water with a few drops of mild dish soap, rinse with clean water, and air dry away from direct sunlight. Start with the gentlest method and only move to stronger treatments if the gentle approach does not work. Always test any new product on a small, hidden area first, because soft minerals, fractured pieces, and light-sensitive specimens can be damaged by harsher methods. Keep handling to a minimum while the specimen is wet.
Can you clean raw minerals with water?
Yes, water is the best starting point for most raw mineral specimens. Lukewarm water with a small amount of mild soap removes dust, grime, and loose debris without harming most stones. However, some minerals react badly to water. Soft or water-soluble minerals can dissolve or crumble when soaked, and porous specimens can absorb moisture and stain. Check your specimen's hardness and surface before soaking, and skip prolonged soaking for delicate or fragile pieces. Dry the specimen thoroughly afterward to prevent residue or water spots.
How do you remove iron stains from rocks and minerals?
Iron staining often appears as rusty orange or brown deposits, usually from iron oxide or limonite. Begin with gentle cleaning, since many stains lift with lukewarm soapy water and a soft brush. For stubborn deposits, a commercial iron remover or dilute oxalic acid can work, but only on minerals that tolerate acid, such as quartz. Avoid acids on calcite, malachite, azurite, and other carbonate or copper minerals, which can etch or dissolve. Wear gloves and eye protection, work in a ventilated area, and rinse thoroughly afterward. Neutralize and dispose of used solutions according to local hazardous waste guidelines.